Text guide
Organizing rows and columns
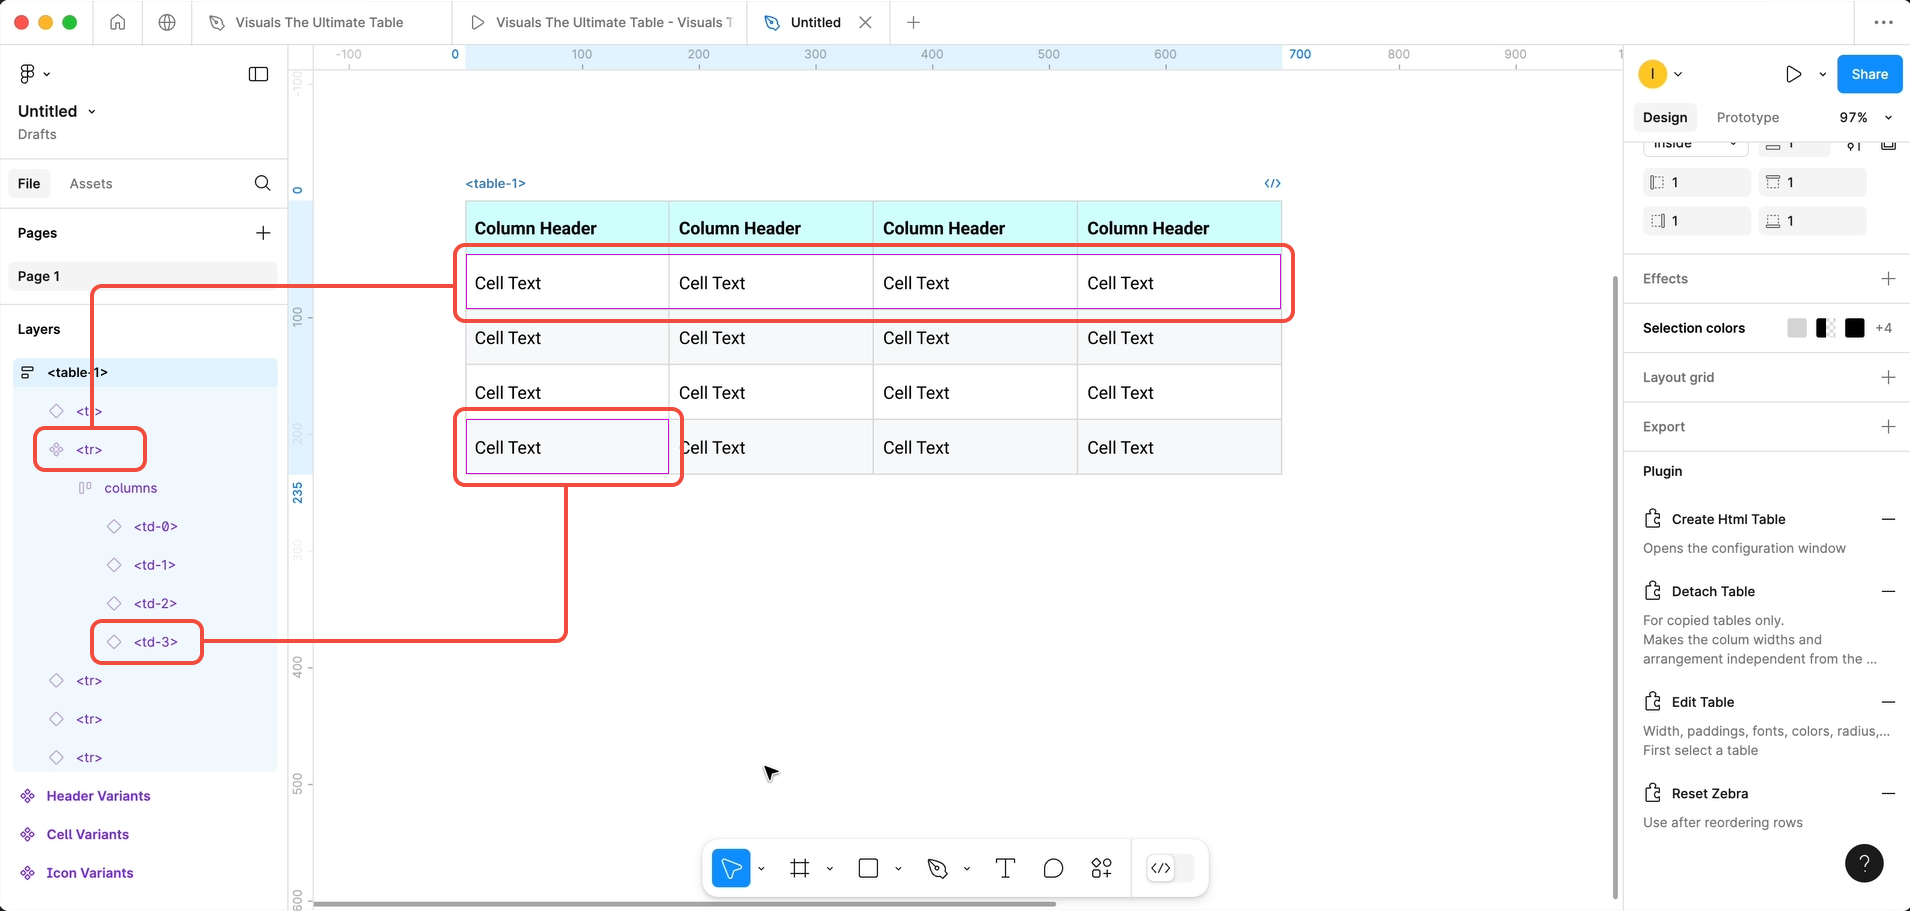
If you are familiar with Figma it is good to know that you can select all elements in the table from the layers panel too. The table has a very clear structure, similar to an html table.
A row is a <tr> element and a cell is a <td> element.
Do not change the naming of the layers as the whole functionality of the table depends on it.

There is only one important thing you need to remember:
All tweaking of columns is done in the first row below the header.

Columns
Alignment

To set the alignment of a column select the cell in the first row and set the alignment with one of the action buttons.
Width

To set the width of a column again select the top cell and manually adjust the width, either by dragging or entering a value. All other columns will divide the remaining space between them.
Order

To move a column again select the top cell and drag it to the desired location.
When changing widths or ordering, be sure to select the cell and not the content inside the cell.
To move a row simply select the row and drag it to the desired position.

If you have chosen zebra styling and you reorder the rows you can reset the zebra by selecting the table and clicking the ‘reset zebra’ action button.
Remember
Always leave the first row (below the header) at the top, as it is the master for all other rows.
